Table of Contents
Importing contacts into your email marketing platform is a crucial step to kick start your campaigns. Here’s a step-by-step guide on how to seamlessly import contacts into SENDCOOP:

1. Creating a New List #
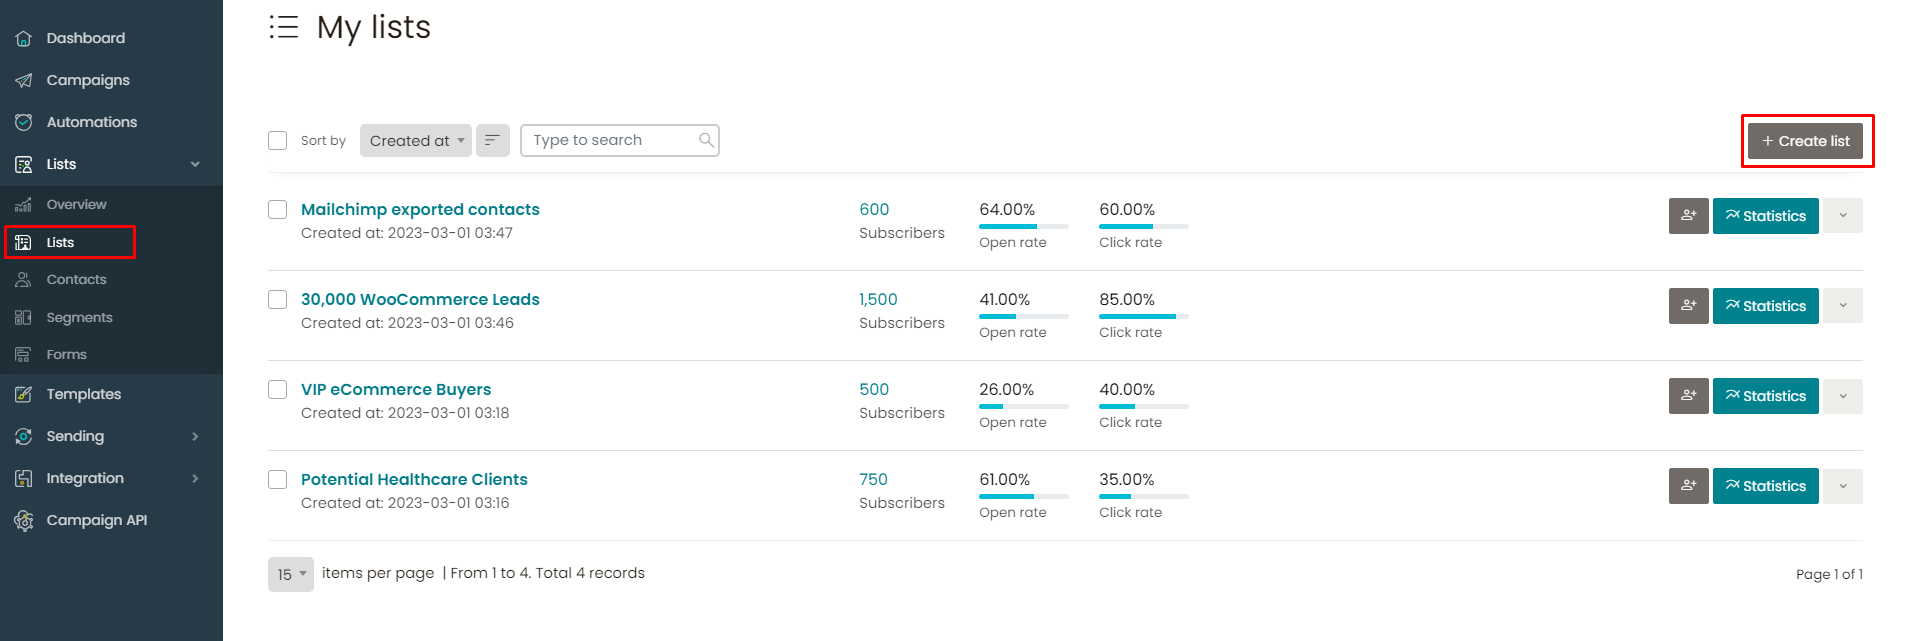
- Navigate to the ‘List’ section and click on ‘Create list’.
- Name your list (e.g., “Test List”).
- Set the default email, name, and subject line. These can be changed later when setting up campaigns.
- If you’ve previously filled in your contact information in SENDCOOP’s settings, you won’t need to input it again. If not, ensure you fill in your company’s details to comply with GDPR rules.
- Decide if you want to send a subscription confirmation email, a final welcome email, or an unsubscribe notification. These can be toggled on or off based on your preference.
- Choose your sending servers and save your list.
2. Adding Contacts #
There are multiple ways to add contacts to your list:
- Manually: Add contacts one by one.
- CSV Import: If you have a pre-existing CSV file with contacts, you can easily import it.
- API Integrations: Use campaign APIs to integrate with tools like Zapier or custom applications.
- Web Forms & Pop-ups: Create embedded forms or pop-ups to capture leads directly from your website or share a subscription form link with potential subscribers.
3. Customizing Your List #
- You can add custom fields to your list, such as age, gender, country, and industry.
- To add a new field, go to ‘Manage List Field’ and click on ‘New Field’.
- Ensure the column names in your CSV file match the field names in SENDCOOP for a smooth import process.
4. Importing Contacts in Bulk #
- Prepare a spreadsheet with columns matching the fields in SENDCOOP.
- Save the spreadsheet as a CSV file.
- In SENDCOOP, click on ‘Import Subscribers’, choose your CSV file, and initiate the import.
5. Email Verification #
- To ensure the quality of your list, it’s essential to validate the email addresses.
- Use the ‘Email Verification’ feature to integrate with your preferred email verification software.
- Start the verification process to filter out invalid emails.
6. Creating Segments #
- Segments allow you to group contacts based on specific criteria, enabling more targeted campaigns.
- For instance, you can create a segment for males above the age of 20.
- Segments can be used to send hyper-personalized emails to specific groups within your list.
7. Using Campaign API #
- If you prefer, you can also use SENDCOOP’s campaign API to enroll contacts.
- Comprehensive documentation is available to guide you through the API endpoints and token usage.
- If you’re using tools like Zapier or Integromat, they can also be integrated to enroll subscribers into SENDCOOP.

That’s it! With these steps, you’ll have your contacts imported and ready for your email campaigns. If you have further questions, don’t hesitate to reach out for assistance. Happy emailing!


