Welcome to this comprehensive guide on how to map your imported CSV fields with SENDCOOP Audience List. This is a crucial step for anyone looking to run targeted email campaigns. By the end of this article, you’ll be a pro at importing and mapping your email lists in SENDCOOP.
Why Mapping is Important #
Before diving into the steps, let’s understand why mapping is essential. When you import a CSV file into SENDCOOP, the platform needs to know which columns correspond to specific fields like email, first name, last name, etc. Proper mapping ensures:
- Accurate data import
- Effective targeting in campaigns
- Better email personalization

Step-by-Step Guide #
Step 1: Create a New List #
- Navigate to your SENDCOOP dashboard.
- Click on the “Create List” button.
- Name your list and enter your email ID.
- Click “Save.”
You’ve just created a new list where your imported contacts will reside.
Step 2: Import Contacts #
- Locate your newly created list.
- Click on the “Import” button.
- Click “Start Import” and choose your CSV file.
Step 3: Map Fields #
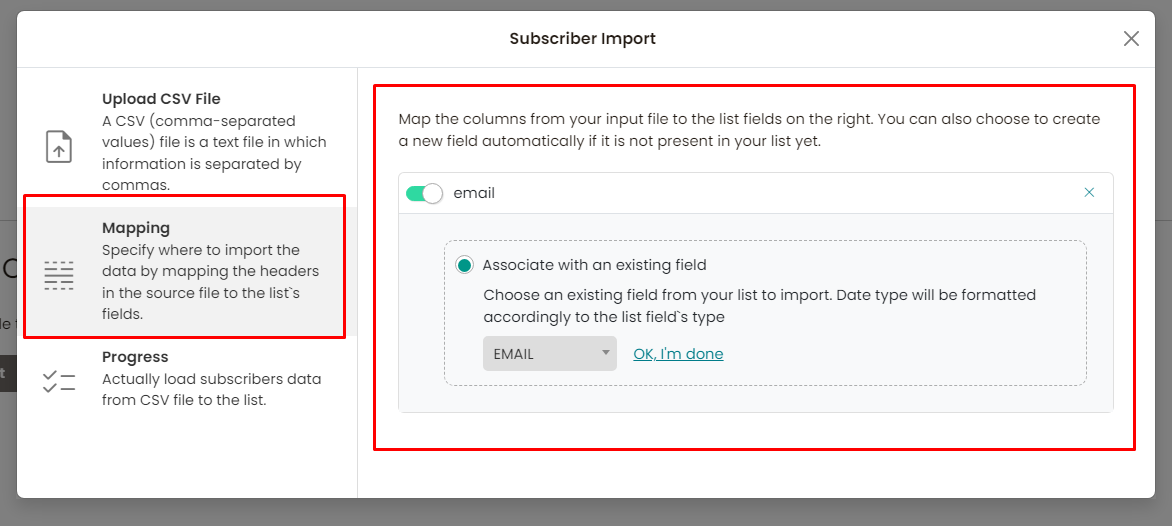
After uploading the CSV, you’ll see an option to map fields.
- SENDCOOP will auto-map some fields.
- You can manually map fields by selecting the dropdown options.
For example, if your CSV has columns for “Email,” “First Name,” and “Last Name,” make sure they map to the corresponding fields in SENDCOOP.
Step 4: Create Custom Fields (Optional) #
If your CSV has additional columns like “Company Name,” you can create custom fields.
- Go to “Manage List Field.”
- Create a new field, e.g., “Company.”
- Save the field.
Step 5: Finalize Mapping #
- Return to the import contacts screen.
- Ensure all fields are mapped correctly.
- Click “Okay, I’m done,” then “Start Import.”
Your contacts will now be reviewed and processed.
Step 6: Review Imported Contacts #
- Go to “View All” in your list.
- Confirm that all contacts are imported correctly.
Conclusion #
Mapping your imported CSV fields with SENDCOOP Audience List is a straightforward process but crucial for effective email marketing. Now that you know how to do it, you’re all set to run more targeted and personalized email campaigns.


