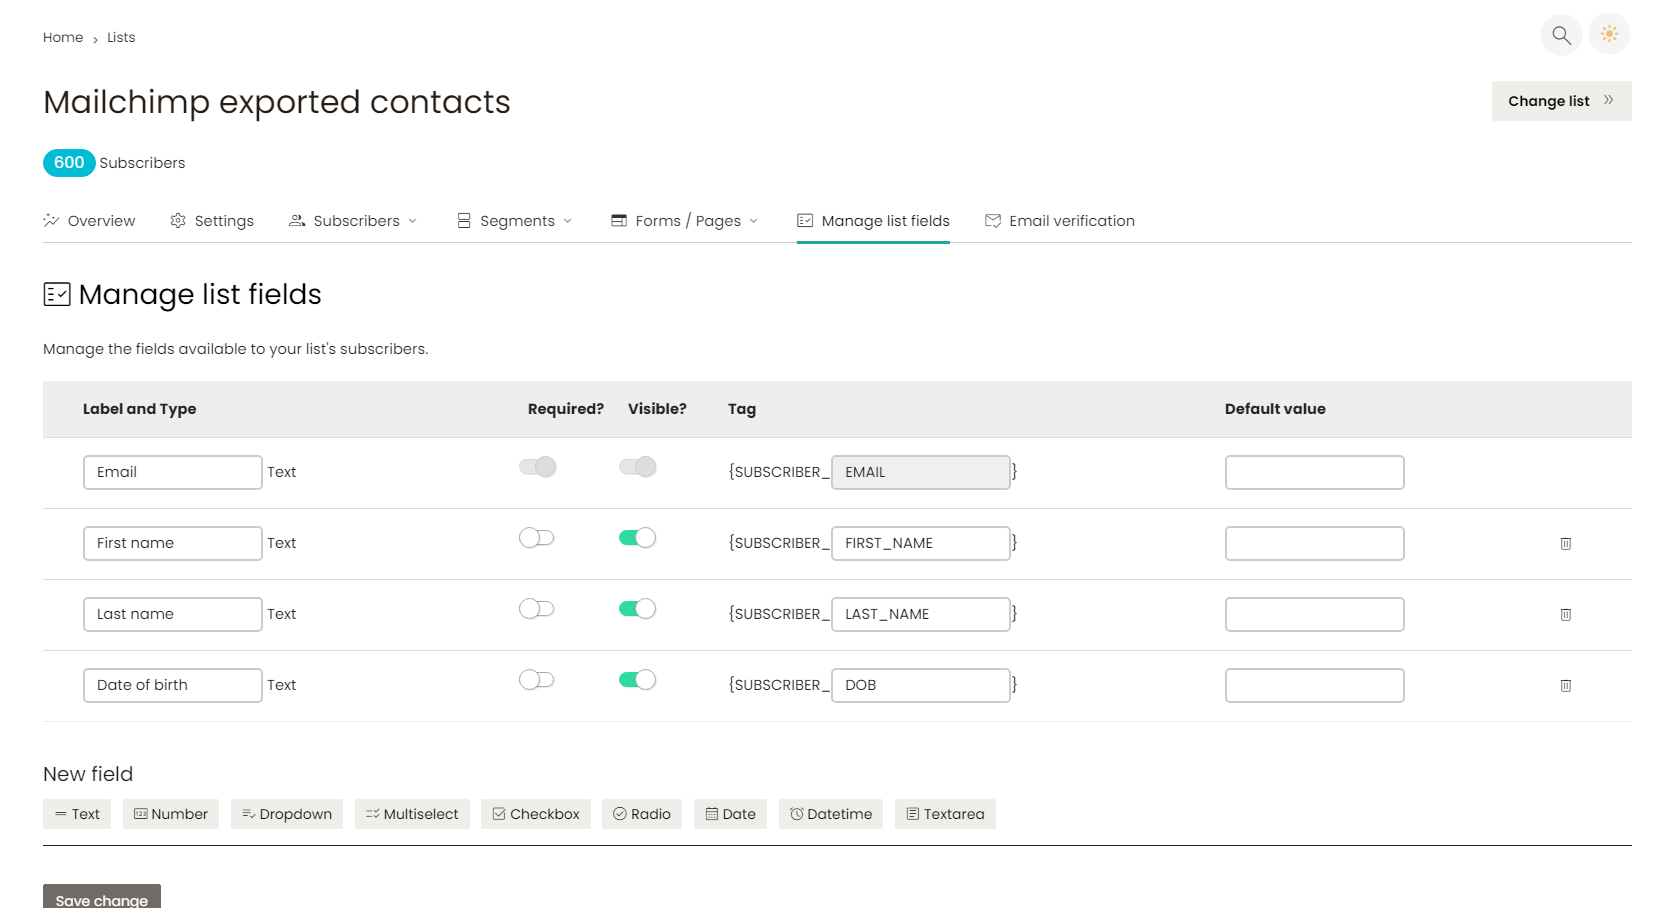
Email custom fields are a type of dynamic content field that can hold the information you specify. Using these features can help you personalize your email, thus, boosting your chance of getting the results you want for your email marketing campaigns.
In the realm of email marketing, personalization is the key to unlocking higher engagement rates. While addressing a recipient by their first name is a good start, true personalization dives deeper. Enter custom fields, the unsung heroes of tailored email content.

Understanding Custom Fields #
At its core, a custom field is a dynamic content placeholder. Think of them as slots that can be filled with specific data about your subscribers. This data can range from basic demographic information to more specific details, depending on your audience and campaign goals.
Benefits of Using Custom Fields:
- Higher Engagement: Personalized emails often see higher open and click-through rates.
- Better Subscriber Relationships: Tailored content can make subscribers feel valued and understood.
- Segmentation and Targeting: Custom fields can be used to segment your audience for more targeted campaigns.
Step-by-Step Guide to Setting Up Custom Fields #
- Select Your Audience List: Begin by choosing the list you wish to enhance with custom fields. For demonstration purposes, we’ll use a ‘test list’.
- Head to ‘Manage List Fields’: This section is your control panel for custom columns. Initially, you might only see basic fields like email, first name, and last name.
- Determine Field Type: Depending on the information you wish to capture, select an appropriate field type. Here are some options and their potential uses:
- Text: Ideal for short, open-ended data like ‘Country’ or ‘Job Title’.
- Number: For numerical data such as ‘Age’ or ‘Years of Experience’.
- Dropdown: Useful for limited options, e.g., ‘Gender’ with choices like Male, Female, and Others.
- Multi-select: Allows subscribers to select multiple options, perfect for ‘Hobbies’ or ‘Product Interests’.
- Date: Capture specific dates like ‘Date of Birth’ or ‘Anniversary’.
- Text Area: For longer inputs, such as ‘Full Address’ or ‘Feedback’.
- Tag Your Fields: Each custom field requires a unique identifier or tag. This tag is crucial as it helps in data mapping and ensures the right content goes to the right place.
- Finalize and Save: After setting up your fields, always save your changes. For numerical fields, set a default value to avoid blank entries.
Incorporating Custom Fields in Subscriber Onboarding #
With your custom fields set up, they’ll appear when you’re adding a new subscriber. This expanded data entry allows for a richer subscriber profile, enabling more nuanced and targeted email campaigns.
Tips for Gathering Data:
- Integrate in Sign-Up Forms: Incorporate custom fields in your sign-up forms. However, avoid overwhelming new subscribers with too many fields.
- Use Surveys: Periodically send out surveys to gather additional information from existing subscribers.
- Offer Incentives: Encourage subscribers to fill out their profiles by offering discounts or exclusive content.
Conclusion #
Harnessing the power of custom fields can transform your email marketing strategy. By understanding and implementing these fields effectively, you can move beyond generic email blasts and create truly personalized experiences for your subscribers. Remember, in the world of email marketing, knowledge is power, and custom fields are your toolkit for gathering that knowledge.
Dive in, experiment, and watch your engagement soar! 🚀


