Table of Contents
Do you want to send birthday emails to your subscribers but don’t have time to do it manually? Well, now you can with our automated email triggers.
Sending personalized birthday wishes to your subscribers can be a delightful touchpoint that strengthens your relationship with them. But doing this manually for each subscriber can be time-consuming. Here’s a step-by-step guide on how to automate this process:

1. Gather Birthdate Information: #
- The most crucial step in sending automated birthday emails is having your subscribers’ birthdates.
- Ensure that your subscriber list has a ‘Date of Birth’ field. If not, you’ll need to add one.
2. Setting Up the Automation: #
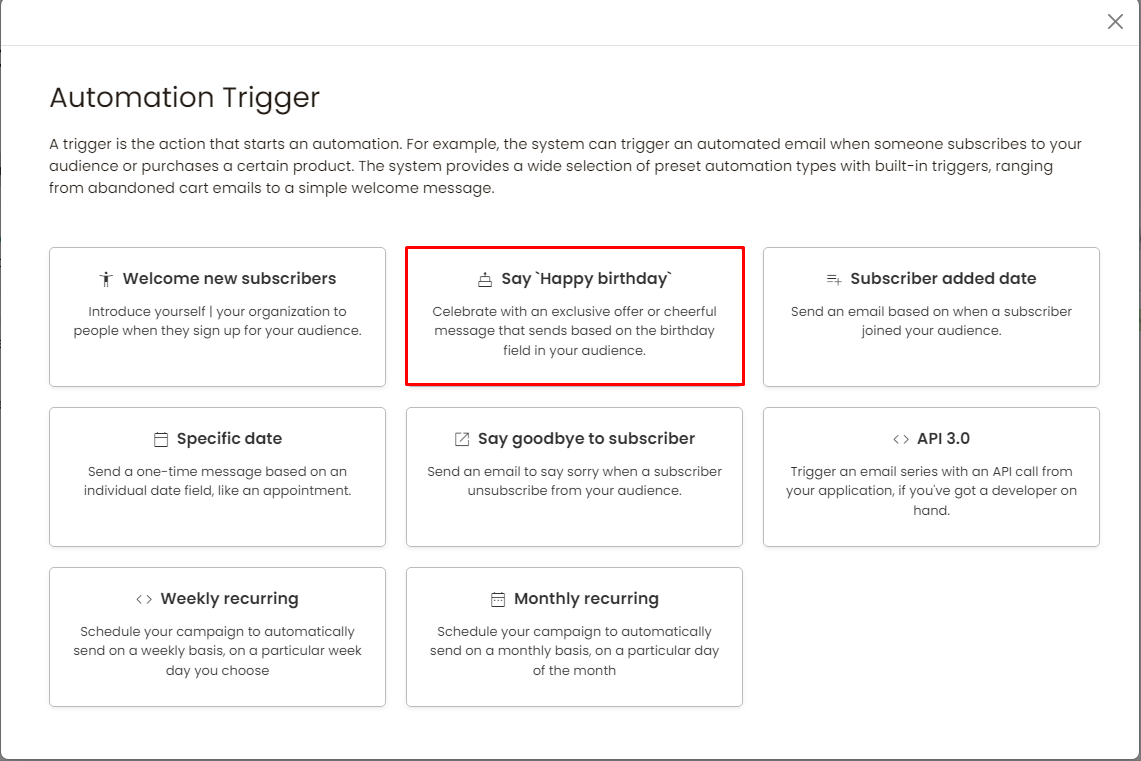
- Navigate to the ‘Automation’ section and click on ‘Add New’.
- Select the ‘Happy Birthday Email Automation’ option.
- You can choose to send the birthday email on the actual day, a day before, a week before, or even a month before. This flexibility allows you to remind subscribers of any special offers or gifts you might have for them.
3. Updating Your Subscriber List: #
- If your list doesn’t have a ‘Date of Birth’ field:
- Go to your list (for this example, we’ll use a ‘Test List’).
- Navigate to ‘Manage List Fields’.
- Add a new column, selecting the ‘Date’ field type.
- Name it ‘Date of Birth’ or ‘DOB’.
- To gather this information from new subscribers, you can:
- Use an embedded form on your website.
- Share a sign-up link directly with potential subscribers.
4. Designing the Birthday Email: #
- Once you’ve selected your list and the ‘Date of Birth’ field, name your automation (e.g., ‘Birthday Automation’) and click on ‘Get Started’.
- Design your email:
- Start with a warm greeting. Personalize it by adding the subscriber’s first name.
- Add a heartfelt birthday message.
- If you have a special offer or gift, include an attractive image that captures attention. You can design this image using free graphic design tools available online.
- Ensure that the image has a link, so that when subscribers click on it, they’re directed to the relevant page.
5. Finalizing the Automation: #
- Once satisfied with your email design, save it.
- This automation will now send out birthday emails to your subscribers based on the schedule you’ve set.
And that’s it! With these steps, you’ve set up an automated system that sends out personalized birthday wishes to your subscribers, making them feel valued and appreciated. Remember, it’s these small gestures that can make a big difference in building lasting relationships with your audience.


