Table of Contents
Are you looking to send automated emails to your subscribers on a specific date and time?
With automation triggers, you can create a set of rules that automatically send your emails at a specific time. This makes it easy to send your email sequences on a specific date and time, without having to worry about timing or scheduling!

Step-by-Step Guide #
- Accessing the Automation Section
- Start by heading over to the “Automation” section of your email marketing platform.
- Click on “Add New” to begin setting up a new automation.
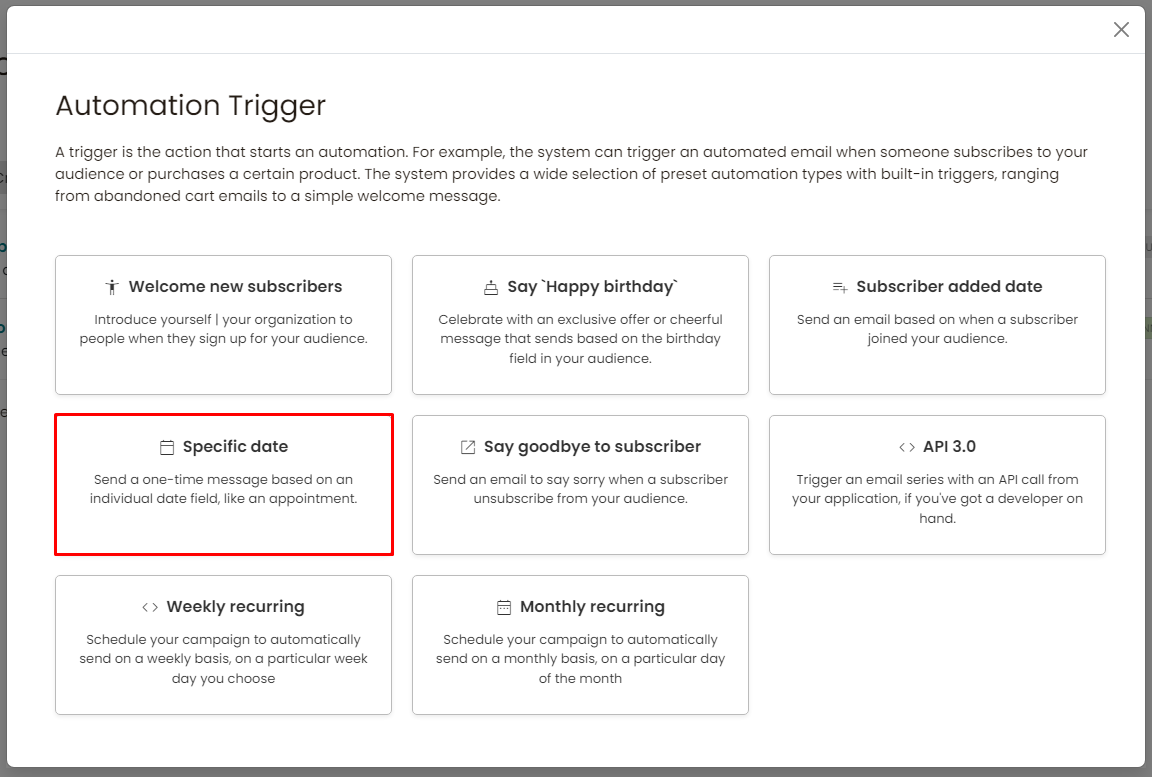
- Choosing the Automation Type
- You’ll be presented with two options:
- Specific Date: This allows you to choose a particular date on which you want the email to be sent. This is ideal for events or promotions happening on a fixed date.
- Based on Subscriber’s Added Date: This option lets you send emails based on the date a subscriber joined your email list. For instance, if a subscriber joined on January 9th, 2022, and you want to send them an email on January 9th, 2023, this is the option to choose.
- You’ll be presented with two options:
- Setting Up the Specific Date Automation
- For this example, we’ll go with the “Specific Date” option.
- Choose the mailing list to which you want to send the emails.
- Pick the specific date you want the emails to be sent on.
- Click on “Confirm Specific Date Automation” and then “Get Started”.
- Adding Emails to the Automation
- Now, you can start adding emails to your automation.
- If you wish to send a series of emails, you can continue adding more with specific delays in between.
- For a single email, input the subject line. For personalization, you can use tags like “Hello [Name]” to address the subscriber by their name.
- Choose your tracking domain and save your settings.
- Click on “Create New Email” and select a template. For this example, we’ll go with a blank template.
- Design your email using the email builder. You can personalize the email further by using tags, such as the subscriber’s first name.
- Once you’re satisfied with the design, save and close the email builder.
- Finalizing the Automation
- After setting up the email, finalize the automation. The platform will automatically trigger this automation and send out the email to all subscribers in the chosen list on the specified date.
- Alternative Automation Based on Subscriber’s Added Date
- As mentioned earlier, you can also set up automation based on when a subscriber joined your email list. This can be useful for anniversary emails or yearly reminders.
Conclusion #
Automation triggers offer a seamless way to engage with your subscribers without the hassle of manually sending out emails. Whether it’s for a special occasion or a regular update, setting up automated emails ensures timely communication with your audience.


